Category Archives: Photoshop

Ajustment Layers: Levels

I wanted to do a tutorial on colour correction but when I started this I realised there are so many ways you can do colour correction that I might as well work though some of the adjustment layers and allow you to apply them to your work and combine them so this is the first of a set of tutorials devoted the Adjustment Layers.

How to find the Adjustment Layers

Adjustment Layers

There are several ways you can access the adjustment layers and depending on which version of photoshop you use it will differ and the panels will differ slightly I’m using photoshop cs5

First way you can access adjustment layers is by going to the menu bar at the top of your window and clicking on Image > Adjustments

The next way to access it is at the bottom of your layers palette, the icon of a circle cut into two and coloured black and white is the logo for adjustment layers.

The third way is for the CS4 and CS5 users and only if you have set up your workspace this way you can create quick links and put them anywhere I’ve stuck mine next to my layers palette so its easy access.

Now we know where they are lets start using them.

Ajustment Layers: Levels Palette

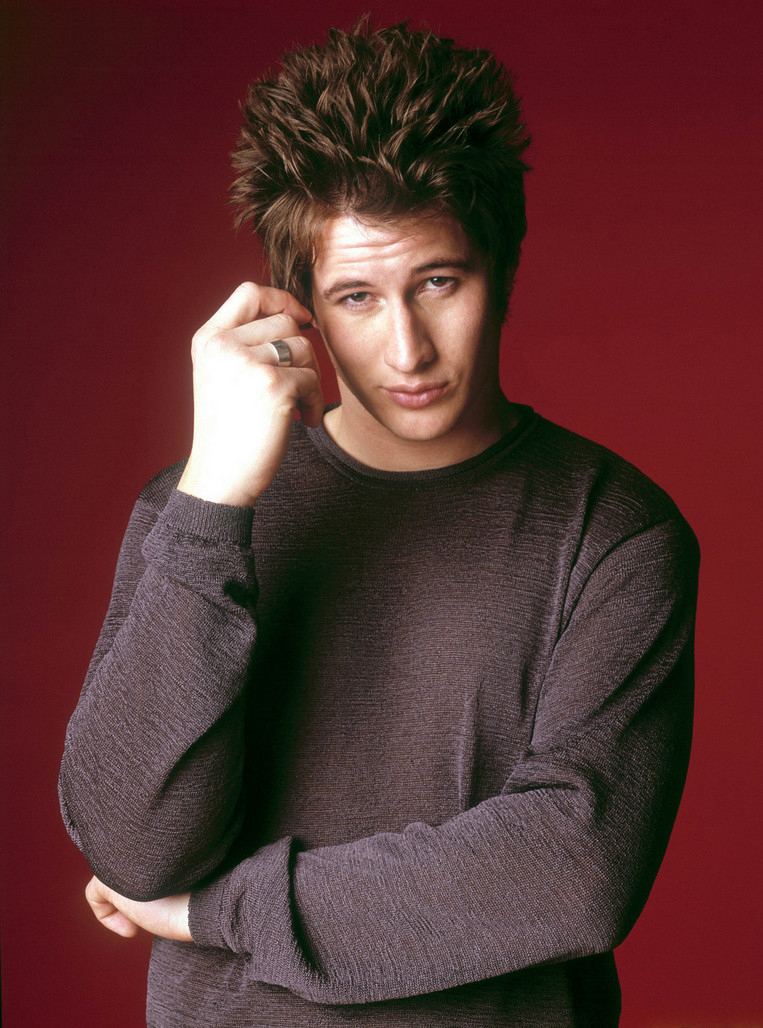
For this tutorial a pretty simple one, the Levels palette, with Levels you can modify the highlights, shadows, midtones and you can also target your basic RGB and improve your primary colours within your images. First get your photo, I like to always work with large images simply becuase its easier to reduce images to the size you want than increase them, so you will need to find a great gallery with lots of high quality images such as one of my all time favourite galleries Pretty as a Picture run by Dana of Chosen Art. I’ve chosen an old Buffy season one photo as a lot of the old Buffy images are quite dark and have a lot of mood lighting already applied to it, and with this tutorial I’ll try and show you how to create your own mood lighting.

Adjustment Layers Levels

Okay so first things first lets see what the Levels palette actually looks like and what’s on it.

Adjustment Layers Levels Layout

Preset Levels: these are defaults set by Adobe for easy and quick modifications generally these are very slight changes like brining out the highlights or darkening the shadows.

Colour Targeting: this dropdown allows you to target RGB which for the newbies means Red, Green and Blue those are your basic primary colours when it comes to digital images, and before anyone says primary colours are Red, Yellow and Blue, that is for things like paint and colours, RGB primary colours are for anything to do with light and everything digital are displayed on monitors or projects which use light rather than actual colours. To modify all the colours without actually giving priority to a single colour use the RGB option.

Image Level Chart: this is a histogram of the exposure levels on your image on your left side you have the shadows and on the right you have the highlights as you can see the image I chose is quite dark so it has more  pixel density on the left hand side telling us that it is a dark image, and if the image was over exposed there would be more on the right hand side.

Under the chart you have your points which are adjustable and moving them along the histogram to increase or reduce the depth of the selected point.

Shadow/Brightness: I don’t generally use this tool as it simply adjusts the amount of darkness and brightness in the image I much prefer to target specific areas… therefore I don’t know much about this tool so I’m not going to go into it in this tutorial.

Lets begin the tutorial by modifying a colour within the image. There are two main colours in this image, Blue, and Yellow so lets play on those colours and try and give this a eerie blue mood.

View Original / Blue Adjustment Levels

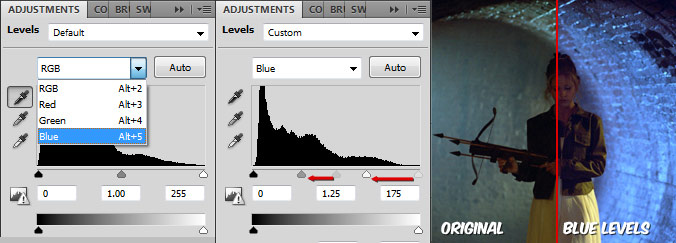
First select the colour targeting dropdown and select blue this give you a new histogram which represents the amount of blue in your image if we move the highlights and the midtones up the scale a bit we can change the turquoise blue to a much deeper blue and you can also see that her dress has turned a bit more blue even though there wasn’t much blue in there anyway this is becuase we are changing the highlights and there will have been a small bit of blue tone within the yellow.  [click the image to see a full size colour comparison between the original and our amendments.]

Now we have a blue image, we can also use this method to remove the blue from the image.

View Blue/Green Adjustment Levels

By moving all the points towards the other end of the scale we can almost completely remove any of the blue within the image this is a great way of quickly adjusting an odd unwanted colour in a picture.

With the levels palette you can combine the different colour targets together to create a new tone to the image. If you now use the colour target dropdown and select Red we can add some red to the image, there wasn’t much red in the image to begin with so this will be a good example of how levels creates colour from the colour that is already present in the image. If you repeat the same sort of action we did to bring out the blue in the image we can convert some of the yellow/green images to an orangey feel [click image below for a full preview of green to orange photo]

View Green/Red Adjustment Levels

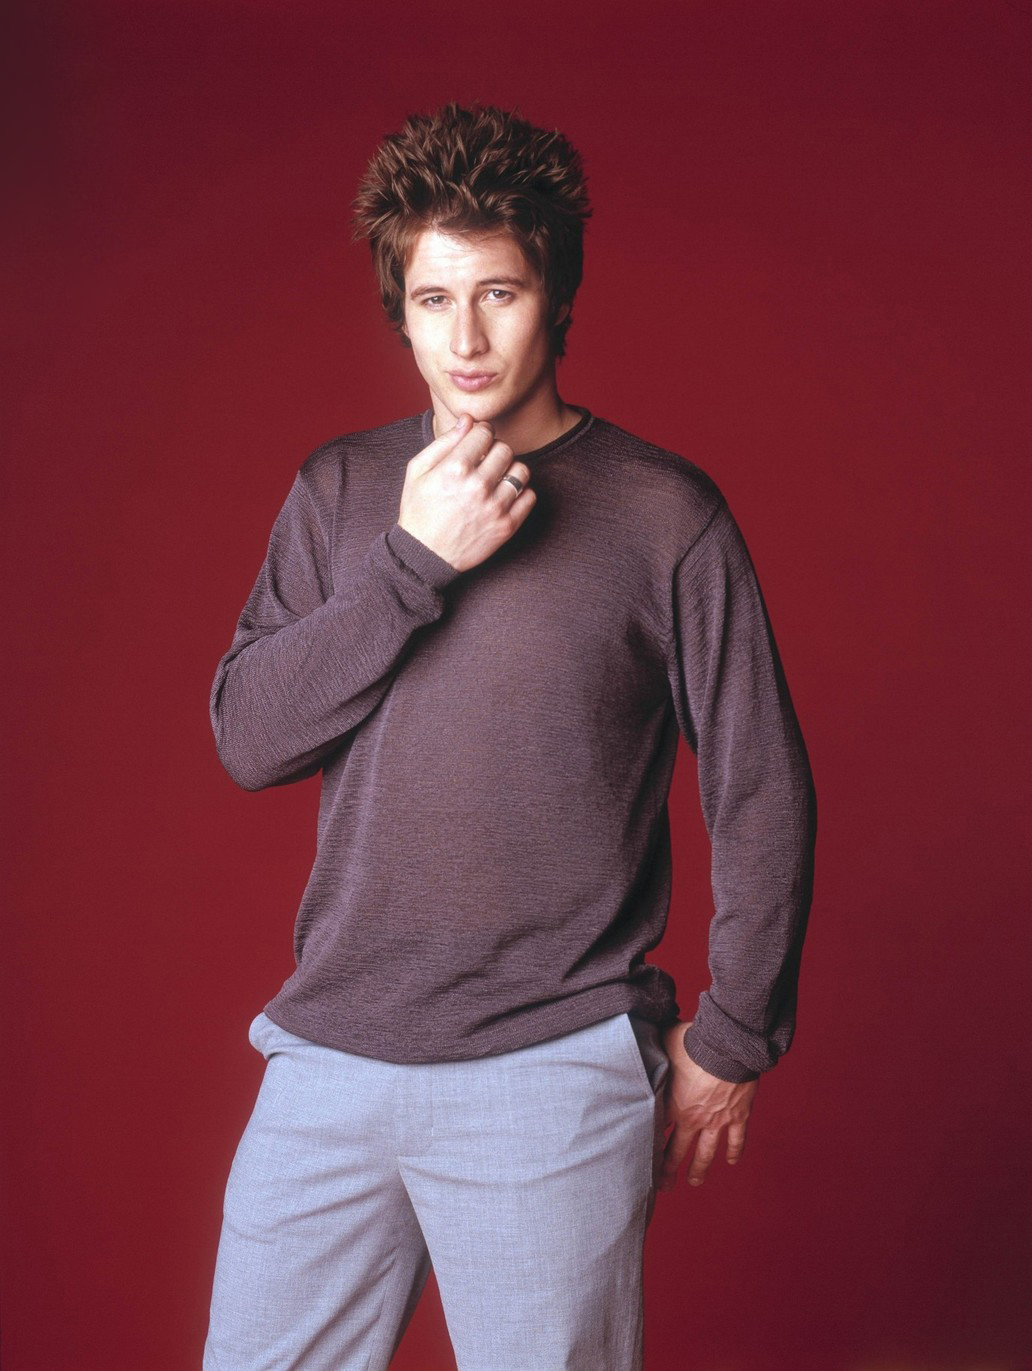
However personally I prefer to use the levels tool to keep most of the colours as they are but bring out their natural colours to make things stand out more such as the brightness of the image, the easiest thing to use it the RGB setting as this will not modify the colours already set in the photo.  So let’s delete that adjustment layer and start afresh. (a good note about adjustment layers are the fact they are independent from the actual photo which means you can adjust the image with out actually affecting the image so if you decided you don’t like something you don’t have to start again this helps when you start using more than one adjustment layer.)

View original/lighting Adjustment Levels

Okay so I’ve lightened the image a bit reducing the amount of shadows by moving the highlights points up the scale and I’ve also soften the shadow, in the general colours by moving the midtones point up the scale. I wanted to keep my shadows black however so I’ve moved the shadow point down the scale a bit

And there we go, your basic adjustment layers palette. View the final outcome of the tutorial or click on the image in this post to view a larger version of the comparisons

Basic Blending in Photoshop

In this tutorial I will talk about blending image together to create a seamless effect for any kind of image and fanart that is easy to use for anyone one from beginners and advanced users alike. This tutorial shows you two methods of blending that work perfectly on their own or used together to create an advanced level of blending.

First Part to BOTH Methods

OK so lets start, firstly pick your images, I like to use large images that way you can minimize them and sharpen then, if you use smaller images you loose quality when you enlarge them. I have chosen two pictures of Brendan Fehr star of Roswell. if you want to use these images to test out this tutorial or you like Brendan Fehr you can get them from these links Image One || Image Two

Create a New canvas any size, I tend to use wallpaper sizes 1024×768 or 1280×1024 it gives you a large area to work with an you can always crop it later. Copy and paste both images into the same canvas and arrange them where you like. (as you know Photoshop uses layers so when you copy and paste the images onto the canvas they’ll be separate layers this is good as you’ll see later.

Now look at your Layer pallet that can be found on the right hand side of your workspace, if you look at the bottom of that pallet you will see a square with a white circle, this is the layer mask button. A layer mask basically allows you to control different areas of the present area in this instance it will help us to control the opacity of certain areas of the images.

Once you press the layer mask button you should notice that a white box has appeared next to your selected layer and also your colour pallet (on the left hand side of your workspace) ha changed to black and white. This is because the layer mask relyes on the black and white tones to tell it weather to delete or show the areas. Black = 0% opacity (Delete) white = 100% opacity (Show)

Method One

Ok now onto the first method. With this one we are going to use the gradient tool, you have to make sure that the colours don’t change from black and white. Using this method is the easiest way to create a smooth fade, it is best to use this method if want a gradual fade.

Now that you have your gradient tool selected click and drag your cursor across the area you want to fade. (remember that black means hide. if you suddenly find you’ve deleted the the side you want to keep just reverse the direction you drag your cursor. )

This is how it looks with a gradual fade, this is just the first time you can repeat this several times to get it the right way, but notice how even the fade is on the images, this is useful if you want to blend images rather than manipulate images to make them look like they are the same image.

To repeat this action you will need to finalize each action, you can do this by right clicking on the gray box next to the selected layer (in the layer pallet) and select “Apply Layer Mask” then repeat the layer mask and the gradient drag to create a new fade on the image.

once you repeat the action a few more times you could come up with something a bit like this, however this is just a quick example, if you spend more time over your placement of the gradients you can make it seamless.

Method Two

Ok now onto the next method, in this way we are going to use the paintbrush tool. Select the paintbrush remembering that black means delete and white means show, you can also change the opacity on the paintbrush by looking at the options tool bar found at the top of your workspace, by changing the opacity you can get a gradual fade, you can also use different styles of brushes, as long as you remember black means delete and white means show.

So paint over the area you don’t want to keep, and if you look at the layer pallet again it should look similar to this where the black area shows the area you have just deleted.

As you can see this provides a more precise way of deleting unwanted areas, I use this method to make images look like they are the same image (photo manipulation) I find it easier to use this one when I know the specific areas I want to get rid of rather than a general blend.

How to Use Gradients

There is no set way in how to use gradients however I am going to show you the way that I think is best, it will hopefully show you that its not just a slap on effect but can make blending gradients easier and look better.


1. have your image to the ready. It doesn’t matter what stage your image/art is at, you can add gradients at all stages of art work I always find it best not to add gradients at the end (although not always) So when you have your image ready look to the layers pallet and click on the adjustment button at the bottom of your pallet, it looks like a circle that’s half black and half white.


(N.B. if you click the arrow in the circle next to the list of gradients you will get an even bigger list for you to select from)
2. Select GRADIENT MAP and a small window will pop up, with a large gradient and with an arrow next to it, if you click on the arrow you will get a lot of other choices of gradients.


3. Once you have chosen your gradient, you will see that even though the gradient is showing on the image you can still see the underlying image, this is in my opinion what makes it blend better. Im not sure why but it does look better.


4. here you will notice that a new layer has been created on you layer pallet, it is this layer that you can edit and modify so without ruining the image or the layer you can edit it all you want.
for editing the layer you would have to use the layer mask which is the white square next to the layer preview. If you want to change the gradient all you have to do is double click on the layer preivew.


5. usually with gradients I just change the Layer Mode and change the opacity, because I like to have all my colours and tones equal to each other. here is an example of what I did with this image of Jake.


6. The best advice I can give you about gradients is don’t be afraid to use horrible and shocking gradients, as you see with the one I used the horrible Yellow and sickly greens Blue and Purple, actually made a nice tone to the image, I also find with gradients they make the image textured simply by highlighting shadows that were unseen before the gradient map was added.